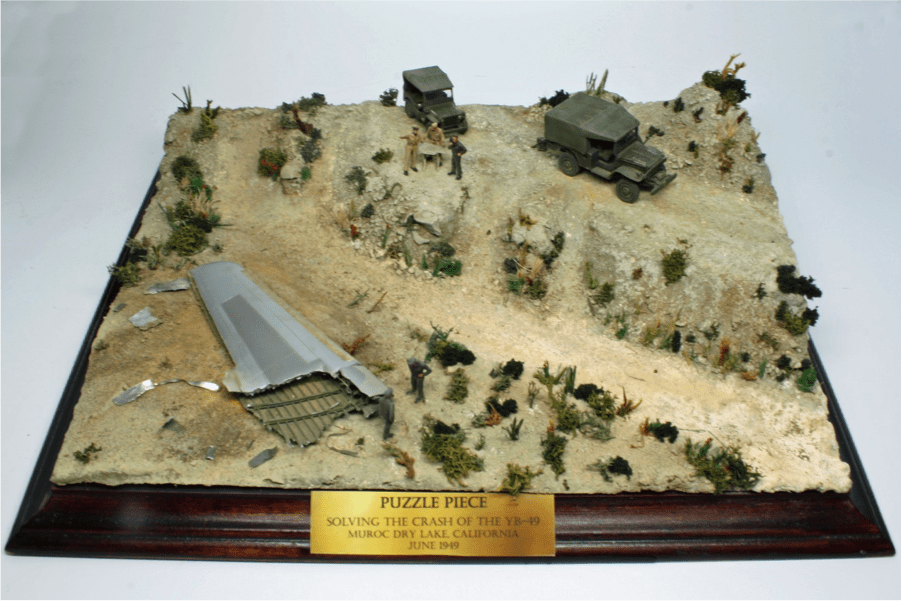
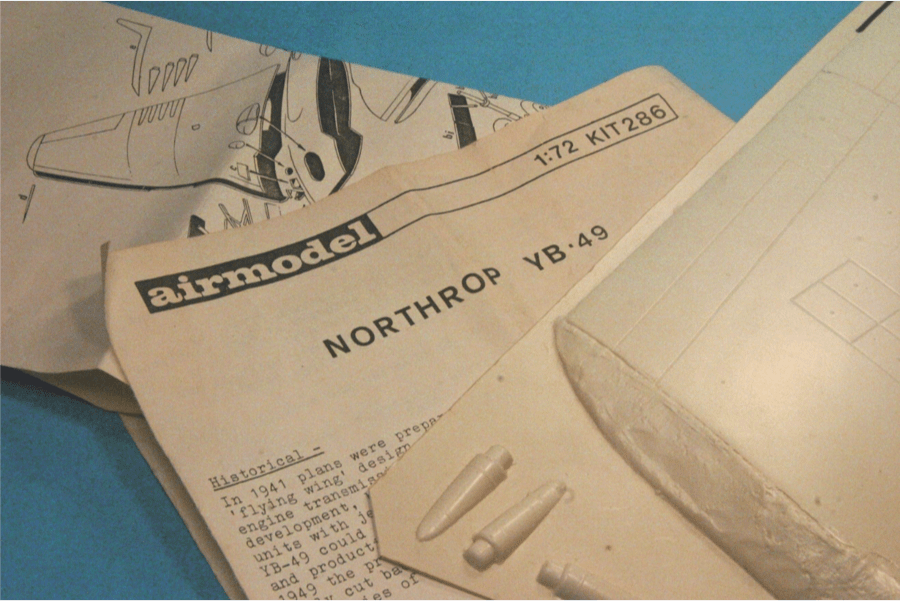
A few years ago, one of my club-mates in IPMS-Birmingham (The Phantom Phlashers) gave me a started copy of the very primitive Airmodel vacuform kit of the YB-49 "Flying Wing," and challenged me to "do something with it."
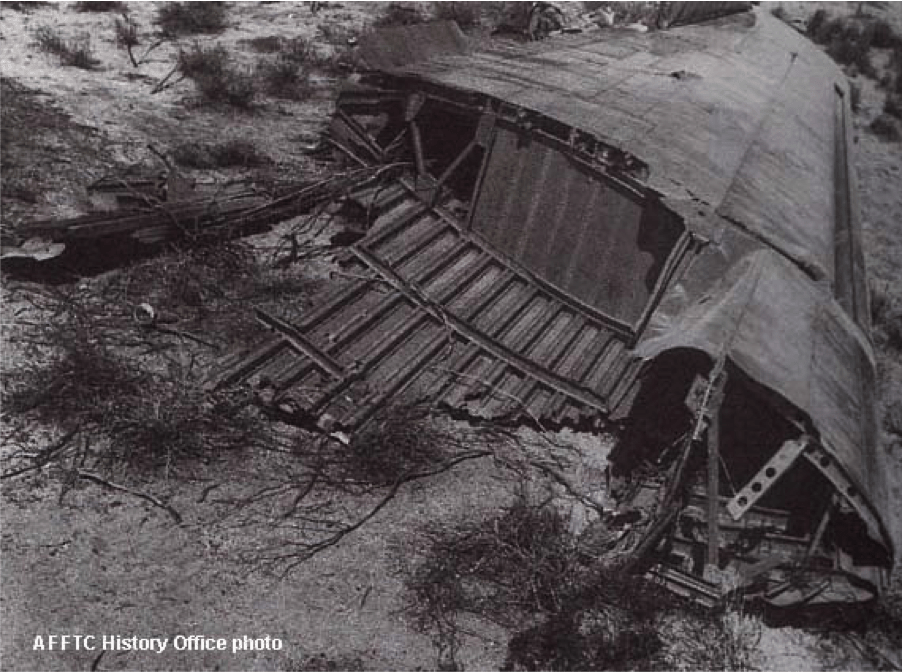
Knowing that I lacked both the skills and desire to build the full kit, I decided to take up his challenge with an alternate approach, using a small portion of the kit as the focal point of a diorama. The YB-49 flying wing prototype broke apart in midair and crashed with the loss of all aboard on June 5, 1948. I was able find an official Air Force photo of the wing tip that separated in air and fell several miles from the main impact site. A web photo of 3 airmen looking at a map on the hood of a Korean War-era Air Force jeep, convinced me to depict a recovery team finding and plotting the location of the wing section that broke away and was the largest recovered piece.
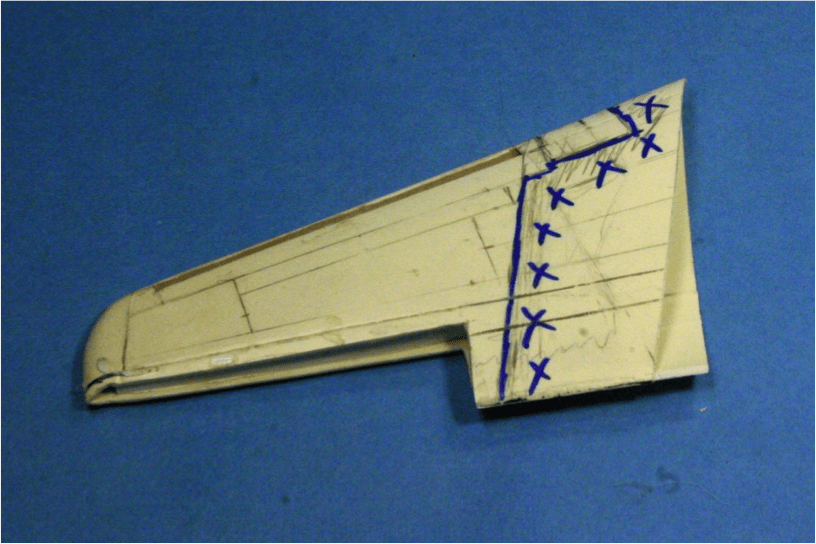
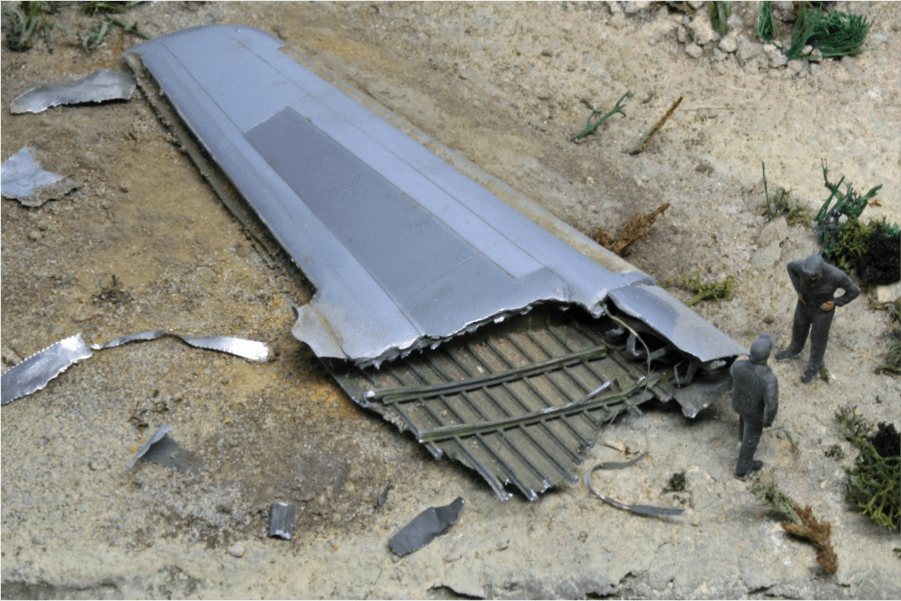
Wing Detail
The appropriate wing pieces of my kit had been separated from the backing already, so cut the wing to a rough approximation of the proper length to match the crash photos. I scribed the few panel lines visible in photos. Then I thinned the edges of wing pieces from the inside with heavy sanding to more closely match the aluminum skin and laid out the internal structures with a pencil. After joining the upper and lower wing halves, I marked cut lines to replicate the torn sections of the skin. I used the crash site photo to guide placement of structural components in the wing, using various strip styrene, etched brass rivet strips, and wine-bottle foil. Based on contemporary photos of other Northrop early jets, I used a green zinc chromate on the interior pieces and several shades of Alclad II on the wing exterior
Composition
One key to a successful diorama is a composition that tells a clear story. I did not discover any photos of YB-49 recovery teams in action, so I had some leeway in telling the story. I sought input from friends and family members involved in screenwriting, game design, and aviation intelligence to help clarify the composition
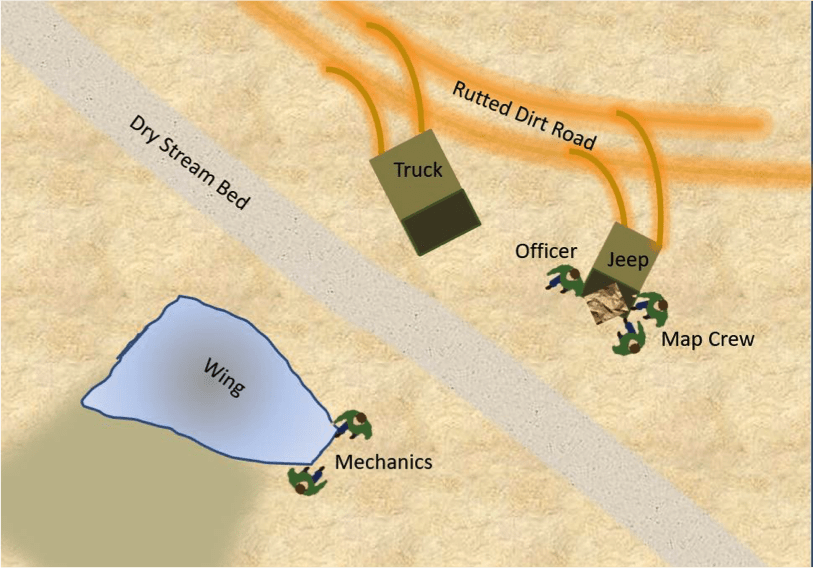
With their input, I decided to use the wing tip, two vehicles, and several figures to tell the story of a crash investigation team trying to sort out what went wrong. I wanted to emulate my inspiration photo with a map spread on the hood of the jeep and three figures interacting over it. The storyboard mock-up is shown in Photo 4.
Figures
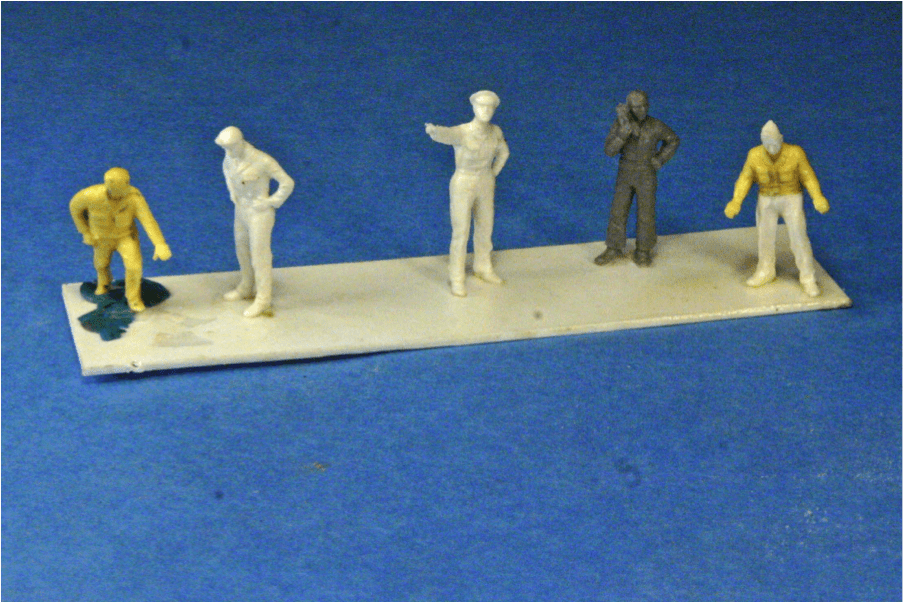
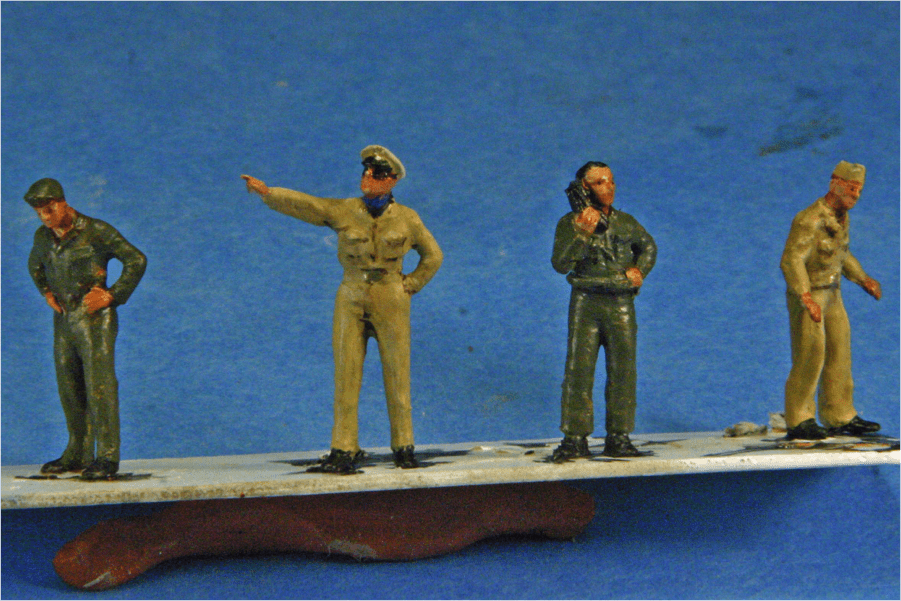
I selected figures from Preiser (pointing officer and standing crew), ESCI (radioman), and Airfix, but converted the two Airfix figures with Preiser parts for better poses. See Photo 5. The officer leaning over has an Airfix torso with Preiser legs and head. The bending mechanic with his hand reaching out is Airfix, for whom I eventually swapped a Preiser head. Attaching the Preiser parts to the slippery Airfix plastic was a challenge. However, I discovered the 2-part “Plastics Bonding System” by Loc-Tite that uses an activator compound designed to allow CA to work on soft plastics like polyethylene. The soft plastic figures were primed with Krylon plastic primer. I used Testors Warm Skin Tone as a base color for the faces and hands, building up with highlights of lighter flesh colors followed by a shadowing with highly thinned (now out-of-production) Flesh Wash by citadel. As seen in Photo 6, I used Vallejo Khaki and Olive Drab for the tan and green uniforms respectively, with the usual shadowing and highlighting techniques. I knocked down the gloss with Citadel “Purity Seal” from a rattle can. This is a dead flat top coat designed specifically for wargaming miniatures.
Vehicles
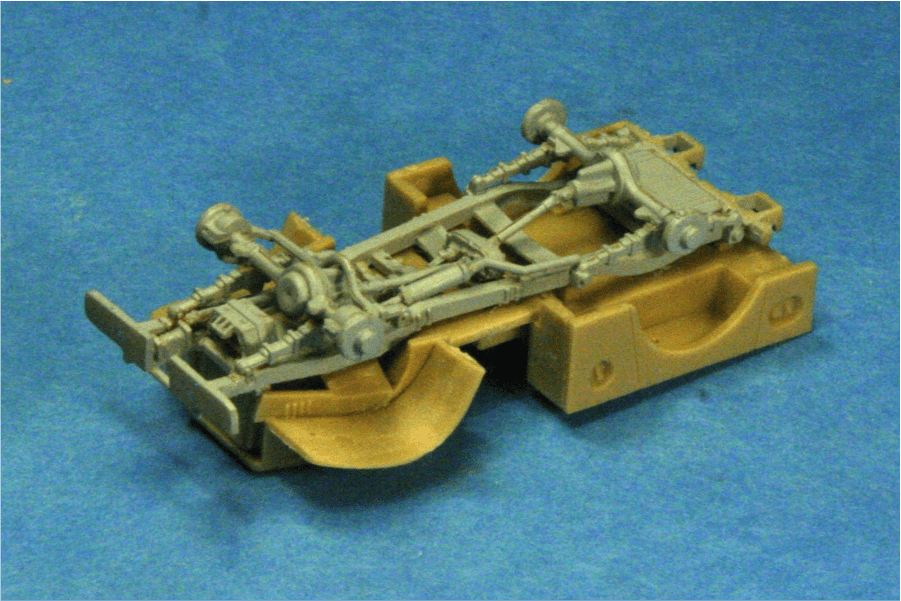
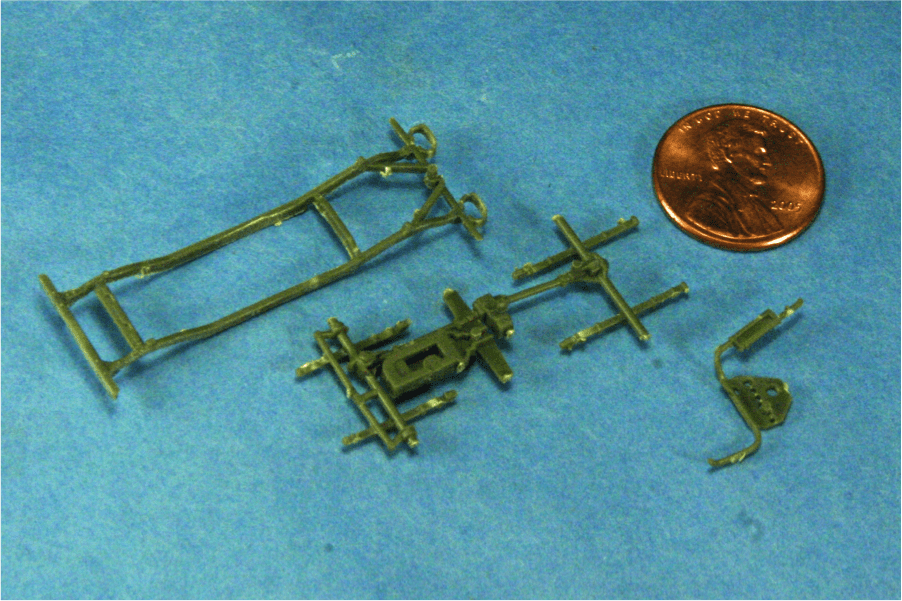
The vehicles are an ESCI WC-52 and a Jeep is from S-Model. The ESCI light truck is an old warhorse and needs modification to the mounting points of the springs to achieve the correct, and much lower, sit on the wheels. See Photo 7 (above, right). I think the S-Model kit is the best Jeep in 1/72 and includes some of the finest molding I have ever seen in this scale. The frame parts are so fine that special caution is needed to prevent snapping them while removing them from the sprues. See Photo 8 (below). The main color for both vehicles was Tamiya Olive Drab, which is a good match to fresh Army vehicle OD. I chose this shade because I’m depicting captive airbase vehicles and not tired veterans. I used the Vallejo fading and weathering system kit for green vehicles and found it was a breeze to use.
Scenery
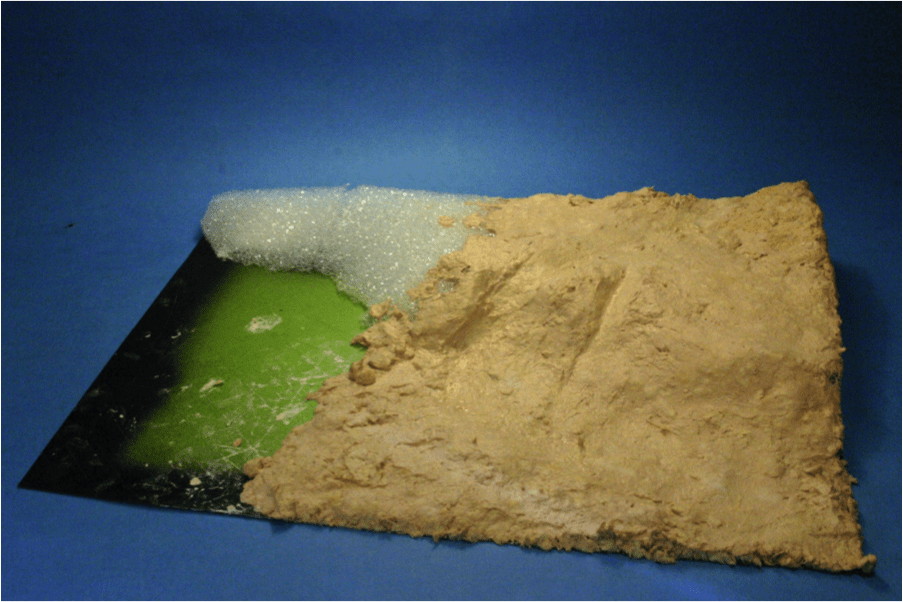
After studying a lot of photos of the region where the crash occurred, including some modern ones of the crash site itself, I began making the land forms. The photos show the application of Sculptamold (tinted with brown India ink and yellow food coloring) over a styrofoam hill form, which I had glued to a plastic sign board sourced from the local hardware store. See Photo 9 (above). The green sign board was cut to the size and shape of my wood display base and served as a moisture barrier between the wood plaque and the water-based scenery products. The foam foundation kept the Sculptamold, a papier mache product to less than1/2 inch in most places. It still took nearly a week to dry
Once dry, the landforms were further refined with a layer of Durham's Rock Hard wood putty, which is a plaster-like powder that comes pretinted a sandy tan color and gives a more scale texture than the coarse Scuptamold. I applied this with a disposable plastic knife. I sculpted the "rock" outcroppings from globs of the wood putty.
Next, I applied crushed stones (picked up from the yard and neighborhood), along with "Talus" and "Fine gravel" from Woodland Scenics to fill in the slopes and provide texture to the surface. This was bonded in by place by sprinkling more wood putty powder over it and wetting with a spray bottle.
When all of this was dry, I sprayed the whole base with a random pattern khaki and sand colors from rattle cans, keeping the eventual road in the lighter color. This was followed by heavy dry brushing of various rock and sand tones mixed from white, yellow, brown, and gray cheap acrylic craft paints. (Those craft people can get 2 ounces of paint for 69 cents! The "expensive" bottles are $1.99!, that's a far cry from the $4-6 per 17ml we're used to in the scale modeling world).
Then I added more sand and gravel, bonded with diluted white glue, and another round of dry brushing. Some brown tempera powder added nice shadows in the rocky slopes. I set that in place with another fine mist of water.
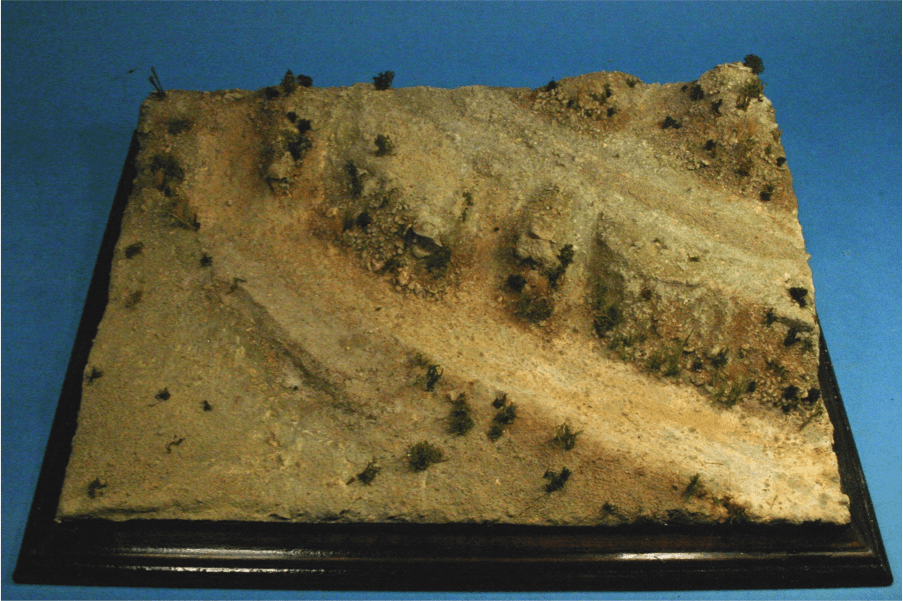
I spent an evening or two applying foliage and grass to the base. I made the grass tufts along the arroyo/dry wash bank by soaking lengths of natural fiber twine in various mixes of brown ink and green and yellow food coloring. Once dry, I rolled them into tufts, dipped the 'roots' in white glue and inserted them in fine holes drilled in the scenery base. The other foliage is lichen and ground foam from the model train section of the hobby shop. Later I found that these materials are available in much more cost-effective packages from “anything for a dollar” stores and “Michaels” craft stores in the flower arrangement sections. The bright flowers along the dry stream bed add a pop of color; they came from a school-project diorama set at Michaels. Photo 10 is an in-progress shot of the foliage placement.
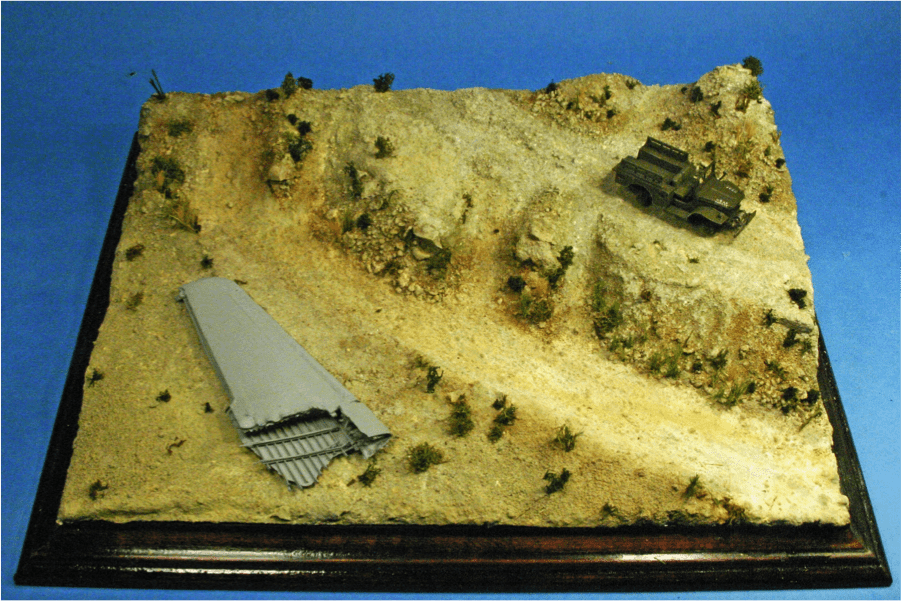
The wing, vehicles, and figures were placed and adjusted until I was pleased with the look. Photo 11 shows this process. I discovered that I could not get the figures to look right hovering over a map on the hood of the jeep. I therefore whipped up a simple trestle table from strip styrene, adjusted the height to match the outstretched arms of the second officer figure and painted it to represent wood. I made a map to drape over the edge of the table from a small square of very thin paper mottled with a light green colored pencil to resemble a topographic map.
Competition Feedback
When it all came together, I was pleased enough with my results to enter it in our local Phantom Phlashers Spring 2015 show, with the title “Puzzle Piece: Solving The Crash of the YB-49,” where it took second place in dioramas. I entered it again in another show in the region later that fall, but came home empty handed. I asked for some judging feedback and learned that my story was being lost from having the elements too spread out. Essentially, there was too much “background” and not a strong enough focal point. I learned I had made a cardinal diorama error in choosing a base and putting a story on it, rather than putting the story together and placing it on the correct base.
Fast forward now to August 2016. I had room in my car to bring some extra models to the IPMS Nationals in Columbia, South Carolina, where the theme was “Every Model Tells a Story.” So, because I liked my story, I packed up the diorama and put it in the car. I recalled the feedback from the prior show and developed a plan.
Reinforcing the storyline
I spent the evening before Nats’ putting a lot more foliage in place through most of the ground areas to highlight the area stripped bare by the wing sliding to a stop. I added torn wine bottle foil and brass strips to enhance the debris trail behind the wing, and used darker pigment powder to suggest freshly disturbed soil along the path of the crashing wing, with more of the same going ahead to indicate loose dirt being tossed into the stream bed.
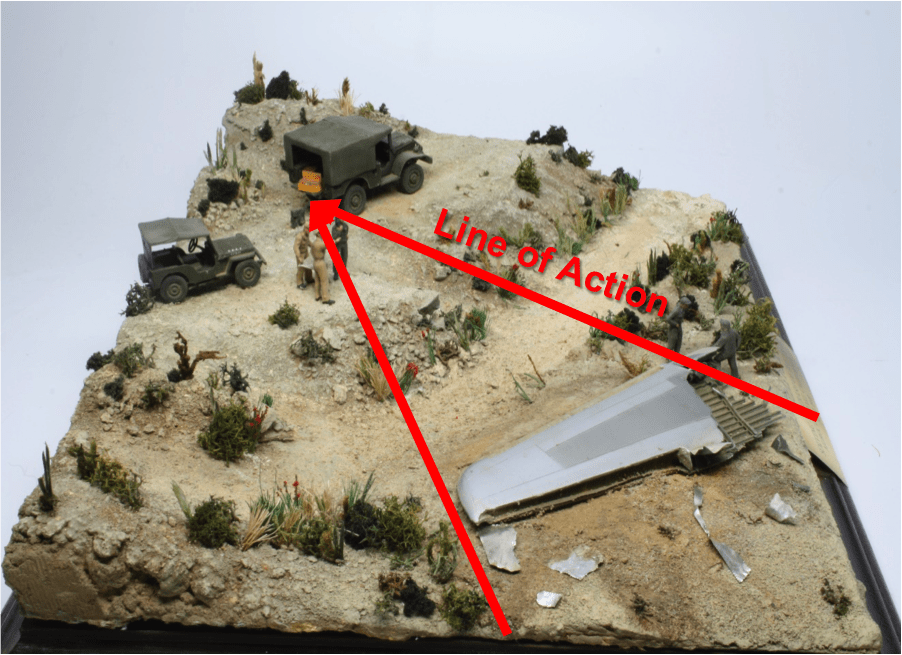
Now, I had a clear line of action for the story. It stretches diagonally from the debris trail, through the wing itself, to a prominent outcropping, along the outstretched arm of the senior officer, and across the map table to terminate on a bright yellow toolbox and red fuel can in the bed of the WC-52. The action is reinforced by the gaze of the officer and the radio man, as well as by the arrangement of the two crew members at the wing itself. Photo 13 shows the line of action.
In the end, those last minute revisions in response to the judges’ critique must have paid off, because “Puzzle Piece” took 3rd Place in Small Scale Armor Diorama and Vignettes in Columbia.